Sunday, August 20, 2017

Are you tired of dollhouse things yet?

I've been consumed by this dollhouse.  It's so much fun.  My husband keeps asking me if it's my new hobby or if I'll be flipping dollhouses from this point forward...I'm not sure if he's frustrated with my new interest or what.  I told him that this house is probably the only one I'll do - I mean, where would I put any others?  

Anyway, eventually the dollhouse will need some art for its walls.  I have some pieces that came with it, so they'll go up.  I'd like to change them a bit, but Z likes them the way they are.  We'll see.  

I also bought some tiny canvasses from Michael's and had a painting session with the girls on the back deck.  I'm not sure if we'll use anything, but it kept them occupied for an hour or so:

Here's my effort:
This then morphed into a let's paint the dollhouse furniture session.  Luckily, I had these two clunky chairs that I picked up for like 50 cents each at the thrift store.  I hope this gets their desire to paint the furniture out of the way...painting is my job in these here parts.


And then there was this sticker that I found.  It refers to the Hamilton musical and I thought it would look great in the house, but it's a bit too big.  Do you suppose I could scan it in and print it out in a smaller size for some dollhouse wall art?  I'm thinking about it.
PS...The Textile Center has a class on making charms out of polymer clay in December and I'm considering this as a place to explore making dollhouse mini things out of polymer clay.  

Friday, August 18, 2017

Special Pieces

A few weeks ago I responded to a craigslist ad for dollhouse furniture.  The seller was an hour and a half away, but I made the trek out there and it was the best experience.  I spent an hour with her, looking at everything she had and talking about the pieces.  We've even become texting buddies - I keep sending her updates on the dollhouse.  She's actually the first person I send things to.  So many of her pieces were so special and actual family heirlooms - pieces that she and her family members had made.  I haven't taken pictures of all of them, but I thought I'd share just a few pics of them.
 I love that dresser.  And those chairs are each hand carved and one piece.  And look at this bed!  So perfect.
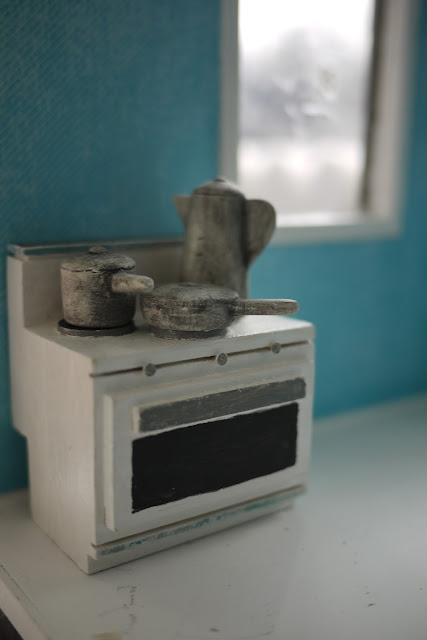
The kitchen pieces are pretty great, too:
 I never would have thought to use hooks for the sink and the knobs on the cabinets and stove are just nail heads.  So smart!


And then there are the dishes and food things!  I can't tell you how smitten I am with them!  My new buddy's daughter was a ceramics major (at least I'm pretty sure that's what she said) and made little dishes and cups and other things for the dollhouse:
 Bacon and eggs!  Loaves of bread!  A pizza!  A pie!  I love them all.

 I don't remember if she said whether or not these pieces were made by her daughter, but I have a feeling that they were:
Oh and look at all the dishes stacked in the china cabinet:
Fun!

PS that cabinet was from the dollhouse lot and it may have been made by the seller from a kit.  When I acquired it, it was brown, but I thought this blue was more fitting for my color scheme:


Wednesday, August 16, 2017

Mingo Madness

At the beginning of June we went to a local festival and my littlest one was having a bit of a temper tantrum about something.  I was able to divert her attention and stop the tears by pointing out a giant inflatable flamingo on top of a building.  She leaned in and said in her squeaky little voice:  I want a 'mingo snuggle friend.

About two weeks later I was down in Florida and figured that would be the best place to find a flamingo stuffed animal, but I never saw one at all.  Instead, I found some flamingo fabric at a quilt shop.  I bought a yard and figured that would be enough for a dress.

A dress.  One dress.  I have two kids.  When the older one learned of the new dress, she threw her usual fit about how unfair life is and how she never gets anything.  Obviously she forgets that she usually gets all the things first because she is much less compliant and easy going than the little one.  So I managed to squeeze out a bodice for the second dress out of the flamingo fabric.

They declined to stand together for the photo shoot and it was really overcast, but they were both in the dresses at the same time so I took advantage of that.  
I used the free Simple Simon Vintage Dress Pattern.  It was quick and easy...until I reached the button-holing.  I hate button holes.  My machine always clogs up and starts to sputter whenever I try them out.  I was in Florida two months ago (*sigh*), so they should have had these dresses before now.  Stupid button holes.
I made the first one and it went just fine.  When I got to the second one, it went to shit.  I just gave up at that point and decided to go to a professional tailor for the button holes.  I needed 15 (!) button holes for these cute little buttons:
Schwanda!

Anyway, there was just no way I was going to finish 15 buttons before the end of the summer, so I forked over way too much money for someone else to make me button holes.  Seriously.  I mean, I like to think that I'm saving myself some money by making clothes for my kids, but these dresses have cost much more than I have ever spent on like 20 kids' dresses.

Whatever.  

Second dress:
The white fabric has the advantage of coming with a hem and the disadvantage of being sort of see-through.  I found an iron on patch at Target:
I suppose the white also has the disadvantage of being white.  The first thing my husband said about the dress:  "It's going to get so dirty."    Ugh, well what else is new?  My eldest is covered in pee, paint, markers, maple syrup,  dried milk, spaghetti sauce, and dirt 80% of the time, so...yeah, I know that it will get dirty, but it was free fabric that I didn't have to hem.   

And what about that 'mingo snuggle friend?  I found one and she loves it.


 The other one did not get a snuggle friend (she has like a gazillion of them), but I gave her two tiny flamingo figurines.  Here she is pouting about the lack of snuggle friend.  Eventually I was able to show her that she had three special flamingoes (the two in her hands and the one on her dress).
She eventually came around:
                                                                                                                                                                          

Tuesday, August 15, 2017

Floors Update

I decided to use basswood strips for the floors.  I thought about scrapbook paper modpodged onto it and I thought about laminate floor samples and I also thought of actual dollhouse flooring.  I scrapped all those ideas.  The basswood strips are pretty cheap at the model train store, except I bought them out...with 22 strips.  I don't know when they'll order more.  

I stained them and when they are all down, I'll put a layer of polyurethane over them all to make them a bit more durable.  I then cut them into 2" strips and glued them down with Aleene's Tacky Glue.  I've also run out of strips.  I think I'll need 60 more to finish the house.  This is what I've got so far:
With the above picture you can see how different it makes it look - comparing the white floors to the wood floors.  It makes it look like a real house, right?

It's hard to keep them all straight.  I see a gap that I have to fill.  It's also hard to keep them all lined up right at the edge.  I've been using an exacto knife to fix them, but I think I'm going to lose my thumb if I keep at it.
I was also a little sloppy in the bathroom and there are some gaps:

Nuts.  When I've tried to cut pieces that are that small, they've splintered.  Stinker.  

Oh...and sparkly wallpaper in the smaller bedroom:
I'm thinking long red satin curtains in there.  I wonder if grommets will fit on the curtain rod.  I kept the ones that came with the house, but I also bought one mini dowel if I needed extra.  I don't remember if all the rooms came with rods.  I also kept the little eye hooks that act as curtain rod brackets.

For the record (I'm not sure if I've mentioned this):  I didn't want to do curtains in any of the rooms.  When I took the curtains out of the house at the start of the renovation, they were so dusty and gross, so I was a bit turned off them. I even spackled over the holes when I thought the rooms would be painted instead of wallpapered.  However...my kid wants curtains, so curtains she shall have.

Sunday, August 13, 2017

Walls Update

The wallpaper is up on the dollhouse.  It was a pretty easy undertaking once I got started.  When I took all of it off, I am pretty sure the previous maker had wallpapered before he put the walls together, but I ended up making construction paper templates that worked really well to get around the windows and whatnots.

I realized after I downloaded all my photos that I don't actually have individual photos of the rooms - just some snippets of the wallpaper on the walls...so we'll just go with what I have.

The living room:
This room had that fun little chair rail to break up the wallpaper.  The red has a bit of sparkle to it:
My mom says it reminds her of old-timey flocked wallpaper, but I feel it's pretty modern.  And check out those curtains!  That was lace that I used on a fancy apron a gazillion years ago...so impractical for an apron, actually.  I only had enough to make these curtains and I can't decide if I should put a little tie on them or drape them to the side.  

As for the bottom half of the room, I used some siding I found at the model train store.  I painted it gray and tried to glue it on with modpodge, but that just made it curl.  Then I tried hot glue and that left it lumpy.  For my final option, I went with scrapbooking sticky dots.  I ran out right at the end, but I'd also run out of the siding.  It's really not the best -- it shows the seams and I don't think it will stand the test of time.  We'll see.

Seams:
Hidden by the curtain:
So I went with a green for the bigger bedroom, but I didn't have enough of it, so I had to supplement with some yellow.  There's a funny seam on the yellow, too, but I think it will be hidden with a curtain and some furniture.
 The green has some shimmer to it, as well.
The hallway also has some shimmer:
I was going to use a small floral in the kitchen, but went with the larger print instead.
 It also has sparklies:
As for the dining room, I went with this small print:
That's the door that leads to the outside that is half painted.  I can't decide if I should paint it white or blue.  I don't know.  

Speaking of paint...I have to figure out what to do with the stairs:
It's sort of half-assed with the white.  I don't know.  I'll have to think about it.  

So that's it for pictures of the rooms.  I guess I forgot the bathroom and the smaller bedroom.  Next time.

Sunday, August 6, 2017

Floors

I'm going to have to do something with these dollhouse floors.  This flat paint is getting marked and stained each time the kids touch it.

This is a spaghetti sauce fingerprint:
Then you can see some of the scuffs from them dragging furniture around.
You can see the walls that I have wallpapered a bit already.  So fun.  I can't wait to reveal them all.  I had some problems with having enough paper to go all around the rooms, so I had to change some of my plans.  It still looks good.

Anyway, I'm thinking of making wooden floor planks out of basswood strips.  It will be a lot of work, but I think it will turn out pretty slick.  I want to stain them light gray...I wonder how hard that will be?

Friday, August 4, 2017

Painting and Planning

Painting the interior and the exterior of dollhouse has been completed.  I decided to go with the stone spray paint for the roof.  It worked really well to cover all of the imperfections.  I opted for some reject gray I had on hand from when I was planning the nursery for the outside and some reject dark gray I had from when I painted the exterior of my own house.  And then there's the pink door.
Don't mind the windows - the painter's tape was still on the inside of the house.  It looks pretty good, huh?  I still have to paint on a doorknob and figure out how to make some window boxes.  I think I'll just do bottom ones.  I picked up some flowers that will work in them.  

I let the girls help with the exterior light gray.  It was a little chaotic, but I survived and did not have to fix very much.

On to the inside.  Here, we have my little helper sanding against the grain.  Oh well.  I debated for a long time about whether or not to paint the floor.  The brown was just so dark and the grain was rather large scale.  I don't know if it was the right decision, but I painted it.
That was a bit of a hassle, as well.  First I spraypainted it with a satin white, but that got all drippity.  Then when I went to go buy a second canister and decided the white was too white, so I got a metallic cream and that provided absolute crap coverage.  Then I panicked and went rummaging through my old paint and found a flat white and slathered it all over the interior.  And that's what you see here.  

It's so white still and the paint is really not what I had envisioned, so I think I'm going to have to wallpaper more than just the back wall of each room.  These are the colors that I've been considering:
They are all mostly from a scrapbook paper stack called Citrus that I had originally intended to use for scrapbooking my wedding.  That was seven years ago and I have not scrapbooked any of it yet.  Blah.