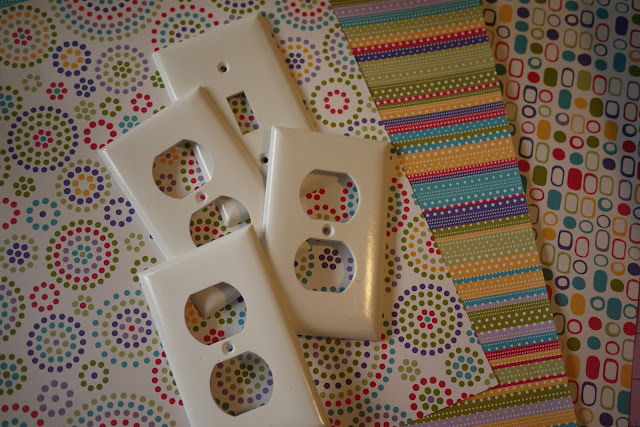
I don't remember when I decided to ModPodge the three outlet covers and the one light switch cover in the nursery, but it was the right thing to do -- I could not allow plain covers in that room! As the stenciling got closer to completion, I knew that I had to go forward with the ModPodge plan.
I've only used ModPodge two times before...once, about ten years ago, to cover an old suitcase with all of this paper that I had accumulated after living in Japan for two years. And the second time was probably about five years ago when I recovered a big Japanese tea box that had been banged up in my many moves. It's pretty easy to work with and the results are always fun.
I've only used ModPodge two times before...once, about ten years ago, to cover an old suitcase with all of this paper that I had accumulated after living in Japan for two years. And the second time was probably about five years ago when I recovered a big Japanese tea box that had been banged up in my many moves. It's pretty easy to work with and the results are always fun.
The paper that I chose for this project was in my scrapbook pile. I can't remember where I found it, but it all came in one of those coordinating paper kits.
At first, I couldn't choose whether or not to just do them all in the same paper or to just mix and match. I really loved the colors in the stripes, but the circles matched the room. And then those little funky oval-square ones were fun too. Since I loved them all, I used them all.
I didn't take any process shots, because my fingers were sticky. I also can't remember which tutorial I checked on youtube...probably whatever came up first in my google search. The only thing that I wasn't sure about was what to do with the paper around the holes. At first I bent it into the holes and modpodged the edges, but once that was dry the covers did not fit back onto the outlets, so I had to take my exacto and slice all that paper away.
Sorry, I couldn't take a picture of the one on the right from anything but an angle, because I kept casting a shadow on it. The third outlet cover is covered in the circle dot paper, but it's behind the crib right now and I couldn't get a picture of it. As for the light switch cover (I keep wanting to say outlet plate...is that what they're called?), I did it in circle dot paper:
I even centered the big circle around the actual flicker thing! And don't mind that stencil underneath it. It was one of the early ones and I tried to see how fancy I could get with the paint. It's my least favorite stencil in the room. Ick! (And sorry the photo is so washed out...I guess I wasn't paying attention to the camera settings in my excitement to document this achievement.)
So what do you think? After seeing them all completed, would you have just done one of the papers or would you have mixed them up like I did? I really like the stripes and it really looks good against the gray wall, so maybe I should have done them all in that. Hmmmmm...


I love them! They give the room such personality!! LOVING the gray walls too. My office/ scrap room has a similar color gray and I LOVE it! Fantastic Rach:)
ReplyDeletei do like the stripes too, but it's a kids room, and kids rooms are destined to be miss-matched!
ReplyDeletei thing you did a great job with the grey walls and the stencils by the way!!!
Awww...thanks Mel and Brain!
ReplyDeletecute!
ReplyDeleteWe do these in our house--but we raid the home improvement stores selections of wallpapers and use those. It's free and already has a glue backing :) I love the baby room--it's perfect!
ReplyDeleteThanks, Robin! I never thought about the wallpaper at home improvement stores! Way to be thrifty and crafty!
DeleteThis is so cute! Such a lot of wow-factor for any easy project.
ReplyDeleteThank you!
Delete